> ## Documentation Index
> Fetch the complete documentation index at: https://docs-dev-feat-init-gt-translations.mintlify.site/llms.txt
> Use this file to discover all available pages before exploring further.
> Pluralsight 向けの SAML2 Web App アドオンを使用して、Auth0 を ID プロバイダーとして設定する方法を説明します。
# Pluralsight を SAML サービスプロバイダーとして設定する
Pluralsight には、次の SAML 設定を使用します。
1. [Dashboard > Applications > Applications](https://manage.auth0.com/#/applications) に移動し、新しいアプリケーションを作成するか、更新するアプリケーションの名前をクリックします。
2. **Addons** タブに移動し、**SAML2 Web App** のトグルを有効にします。
3. **Settings** タブで、**Application Callback URL** を次のように設定します: `https://prod-pf.pluralsight.com/sp/ACS.saml2`。
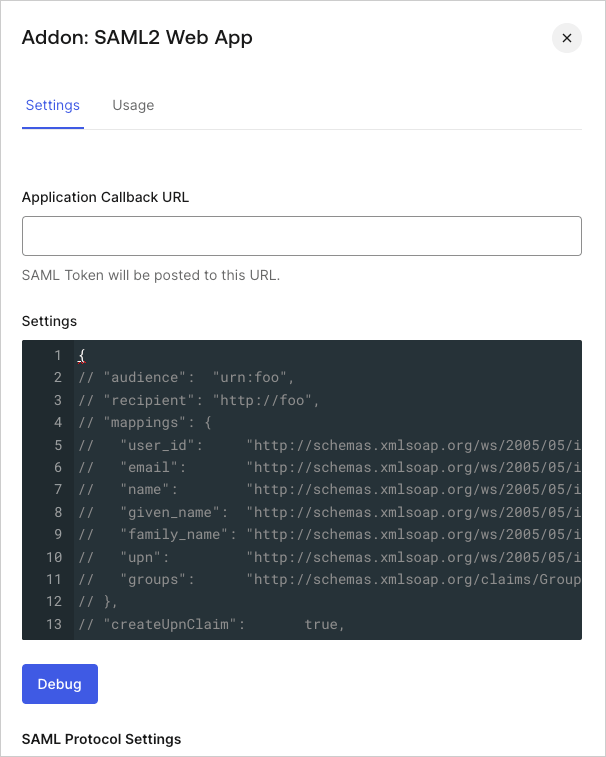 4. 次のコードを **Settings** テキストボックスに貼り付け、**Debug** をクリックします。
```json lines theme={null}
{
"audience": "www.pluralsight.com",
"mappings": {
"user_id": "id",
"email": "email",
"given_name": "firstName",
"family_name": "lastName"
},
"createUpnClaim": false,
"passthroughClaimsWithNoMapping": false,
"mapUnknownClaimsAsIs": false,
"mapIdentities": false,
"nameIdentifierFormat": "urn:oasis:names:tc:SAML:1.1:nameid-format:emailAddress",
"nameIdentifierProbes": [
"http://schemas.xmlsoap.org/ws/2005/05/identity/claims/emailaddress"
]
}
```
5. ページの一番下までスクロールし、**Enable** をクリックします。
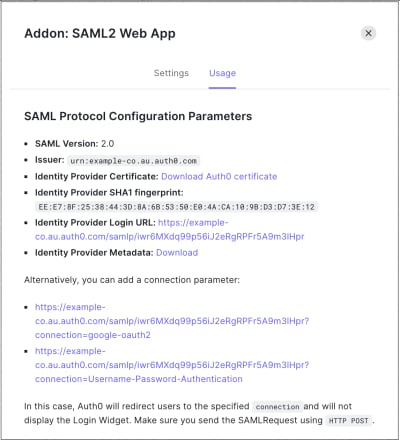
6. **Usage** タブで **Identity Provider Metadata** を見つけ、**Download** をクリックしてメタデータファイルをダウンロードします。このファイルは、Auth0 を ID プロバイダーとして設定する際に必要です。
4. 次のコードを **Settings** テキストボックスに貼り付け、**Debug** をクリックします。
```json lines theme={null}
{
"audience": "www.pluralsight.com",
"mappings": {
"user_id": "id",
"email": "email",
"given_name": "firstName",
"family_name": "lastName"
},
"createUpnClaim": false,
"passthroughClaimsWithNoMapping": false,
"mapUnknownClaimsAsIs": false,
"mapIdentities": false,
"nameIdentifierFormat": "urn:oasis:names:tc:SAML:1.1:nameid-format:emailAddress",
"nameIdentifierProbes": [
"http://schemas.xmlsoap.org/ws/2005/05/identity/claims/emailaddress"
]
}
```
5. ページの一番下までスクロールし、**Enable** をクリックします。
6. **Usage** タブで **Identity Provider Metadata** を見つけ、**Download** をクリックしてメタデータファイルをダウンロードします。このファイルは、Auth0 を ID プロバイダーとして設定する際に必要です。