> ## Documentation Index
> Fetch the complete documentation index at: https://docs-dev-feat-init-gt-translations.mintlify.site/llms.txt
> Use this file to discover all available pages before exploring further.
> Auth0 テナントを Resource App 認可サーバーとして設定し、ID-JAG リクエストを受け付けて API のアクセストークンを発行します。
# XAA 環境設定
export const ReleaseStageNotice = ({feature, stage, plans, contact, terms}) => {
const stageTextMap = {
"beta": "Beta",
"ea": "早期アクセス"
};
const stageText = stageTextMap[stage] || "製品リリース段階";
const prsLink = "/docs/troubleshoot/product-lifecycle/product-release-stages";
const linkify = (text, url) => {
return {text};
};
const includeDetails = (plans, contact, terms) => {
const hasDetails = terms || plans || contact;
if (!hasDetails) return null;
return
{plans && <>この機能は{linkify(`${plans}プラン`, "https://auth0.com/pricing")}でご利用いただけます。 }
{contact && "参加をご希望の場合は、" + contact + "までお問い合わせください。 "}
{terms && <>この機能を使用することにより、Oktaの該当する無料トライアル規約および{linkify("Master Subscription Agreement", "https://www.okta.com/legal")}に同意したものとみなされます。}
;
};
return
{feature}機能は現在、{linkify(stageText, prsLink)}です。
{includeDetails(plans, contact, terms)}
;
};
Resource App 側から見た XAA のエンドツーエンド環境設定には、次の手順が含まれます。
1. [Auth0 で API を設定して登録する](#create-the-api-in-auth0)。
2. Resource App を設定して登録する: これには、Auth0 テナントの設定と、SaaS アプリケーションをエンタープライズ IdP に Resource App として登録することが含まれます。
3. エンドツーエンドフローをテストするために Requesting App を設定する: これには、Auth0 テナントでのテスト用 Requesting App の登録と、エンタープライズ IdP での Resource App へのリンクが含まれます。詳細については、[Requesting App の設定](#requesting-app-setup)を参照してください。
4. Auth0 テナントと顧客のエンタープライズ IdP とのフェデレーションを設定する。たとえば、Okta でテストする場合、エンタープライズ IdP はエンタープライズ顧客の 1 社を表す Okta テストテナントになります。
この記事では、Auth0 環境の設定のみを扱います。各手順におけるエンタープライズ IdP 側の設定については、フェデレーションに使用する IdP とプロトコルに応じて、IdP Integration の該当ガイド ([OIDC IdP としての Okta](/docs/ja-jp/ai-agents-mcp/cross-app-access/idp/okta-as-oidc-idp)、[SAML IdP としての Okta](/docs/ja-jp/ai-agents-mcp/cross-app-access/idp/okta-as-saml-idp)) を参照してください。
Auth0 で API を作成する
Auth0 テナントにカスタム API をすでに作成している場合は、このセクションをスキップできます。
Auth0 Dashboard で、Auth0 テナント内の SaaS API を表す[カスタム API を登録](/docs/ja-jp/get-started/auth0-overview/set-up-apis)します。MCP Server を公開する場合は、[MCP Server の Authorization](https://auth0.com/ai/docs/mcp/get-started/authorization-for-your-mcp-server)を参照し、承認済みの MCP クライアントに発行されたアクセストークンのみを受け入れるようにサーバーを設定してください。
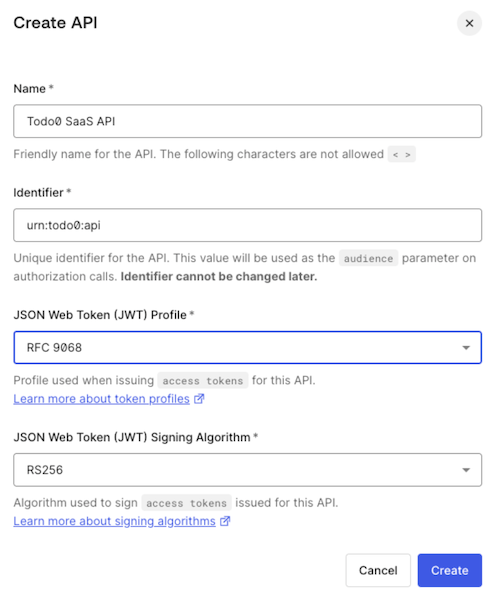 API を作成した後、必要に応じて [Tenant Settings](/docs/ja-jp/get-started/tenant-settings) で、その audience を Auth0 テナントの**デフォルトの Audience**として設定できます。
また、[API Access Policies for Applications](/docs/ja-jp/get-started/apis/api-access-policies-for-applications) を使用すると、どのアプリケーションに対して、どのスコープで API へのアクセスを許可するかをきめ細かく制御できます。
API を作成した後、必要に応じて [Tenant Settings](/docs/ja-jp/get-started/tenant-settings) で、その audience を Auth0 テナントの**デフォルトの Audience**として設定できます。
また、[API Access Policies for Applications](/docs/ja-jp/get-started/apis/api-access-policies-for-applications) を使用すると、どのアプリケーションに対して、どのスコープで API へのアクセスを許可するかをきめ細かく制御できます。
Requesting App の設定
本番環境では、各 Requesting App を一度設定することで、Resource App への接続を有効にできます。
Requesting App を設定するには、次の手順を実行します。
* [Auth0 で Requesting App を作成する](#create-the-requesting-app-in-auth0)
* Requesting App をエンタープライズ IdP に登録します。該当するエンタープライズ IdP については、IdP Integration のガイドを参照してください。
Auth0 で Requesting App を作成する
エンドツーエンド環境をテストするには、Requesting App として機能するアプリケーションを作成して登録します。次のクライアントがサポートされています。
* ファーストパーティまたはサードパーティのクライアント
* Regular Web Application などの機密クライアント
* Native App や Single Page Application などのパブリッククライアント
* [Client ID Metadata Document (CIMD)](/docs/ja-jp/get-started/auth0-overview/create-applications/register-applications-with-cimd) を介して登録された CIMD クライアントまたはアプリケーション
Auth0 テナントで Requesting App に相当する[アプリケーションを作成する](/docs/ja-jp/get-started/auth0-overview/create-applications)には、次の手順に従います。
* **アプリケーション > アプリケーション**に移動し、**Create Application** を選択します。
* 名前を入力し、使用するアプリケーションの種類に応じて **Regular Web Application**、**Native**、または **Single Page Application** を選択します。
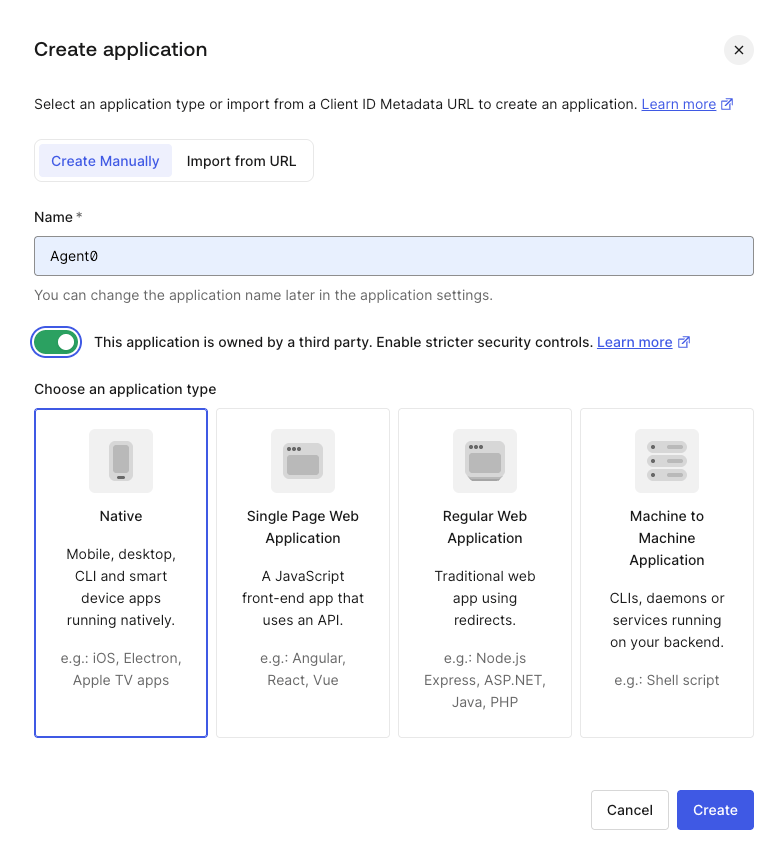 アプリケーションが、最も一般的なケースであるサードパーティアプリケーションの場合は、API アクセス権限を明示的に設定する必要があります。詳細については、[Configure API Access Policies](/docs/ja-jp/get-started/applications/third-party-applications/configure-third-party-applications#configure-api-access-policies) を参照してください。
* アプリケーションの詳細で、**Client ID** を控えます。これはエンタープライズ IdP の設定時に必要です。CIMD アプリケーションの場合は、**External Client ID** フィールドを使用します。
アプリケーションが、最も一般的なケースであるサードパーティアプリケーションの場合は、API アクセス権限を明示的に設定する必要があります。詳細については、[Configure API Access Policies](/docs/ja-jp/get-started/applications/third-party-applications/configure-third-party-applications#configure-api-access-policies) を参照してください。
* アプリケーションの詳細で、**Client ID** を控えます。これはエンタープライズ IdP の設定時に必要です。CIMD アプリケーションの場合は、**External Client ID** フィールドを使用します。
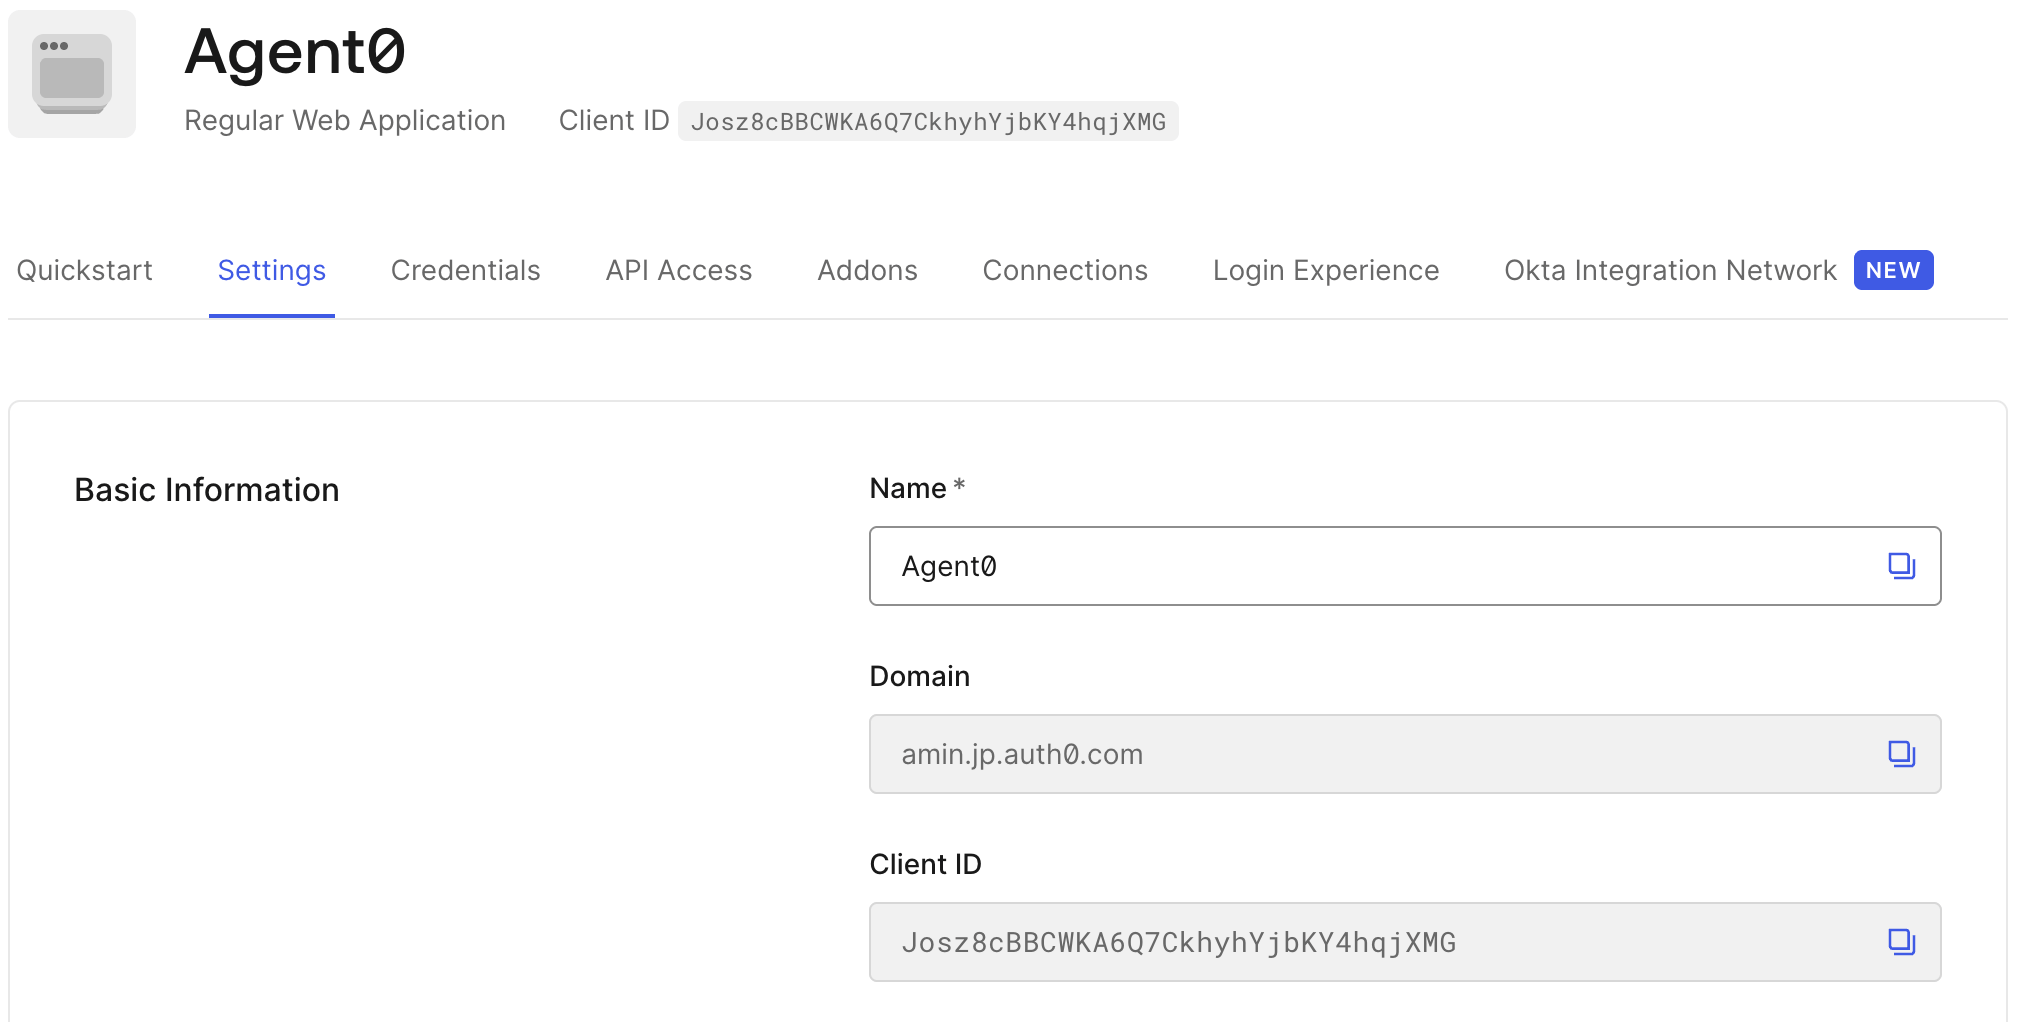 * アプリケーションを作成したら、**設定**までスクロールし、**Cross App Access** トグルを有効にします。
 アプリケーションを作成して設定したら、エンタープライズ IdP を設定する必要があります。詳細については、エンタープライズ IdP とプロトコルに対応する IdP Integration のガイドを参照してください。
Auth0 とエンタープライズ IdP の両方の設定を完了したら、[End-to-end Testing](/docs/ja-jp/ai-agents-mcp/cross-app-access/end-to-end-testing) を参照してフルフローをテストします。
アプリケーションを作成して設定したら、エンタープライズ IdP を設定する必要があります。詳細については、エンタープライズ IdP とプロトコルに対応する IdP Integration のガイドを参照してください。
Auth0 とエンタープライズ IdP の両方の設定を完了したら、[End-to-end Testing](/docs/ja-jp/ai-agents-mcp/cross-app-access/end-to-end-testing) を参照してフルフローをテストします。